There are many options when it comes to installing and running Windows 10 on a Mac computer. One of the most popular options is to use Mac OS built-in Boot Camp Assistant software.
But unlike the other apps that come with Mac OS, Boot Camp has a couple of drawbacks regarding its performance and functionality. Such as,
- It currently supports only a single partition drive.
- Often gives unknown error messages with minimal information.
- Every time it launches, it will automatically download 1.6 GB of Windows drivers. And it is placed under “/Library/Application Support/BootCamp/WindowsSupport.dmg”.
So in this article, we will teach you how to install Windows 10 on Mac OS without using a Boot Camp.
Install Windows 10 on Mac without BootCamp
What you will need
- A USB Stick (8GB or larger)
- A Valid Windows 10 license
- A copy of the Windows 10 ISO
- A Downloaded copy of the unetbootin
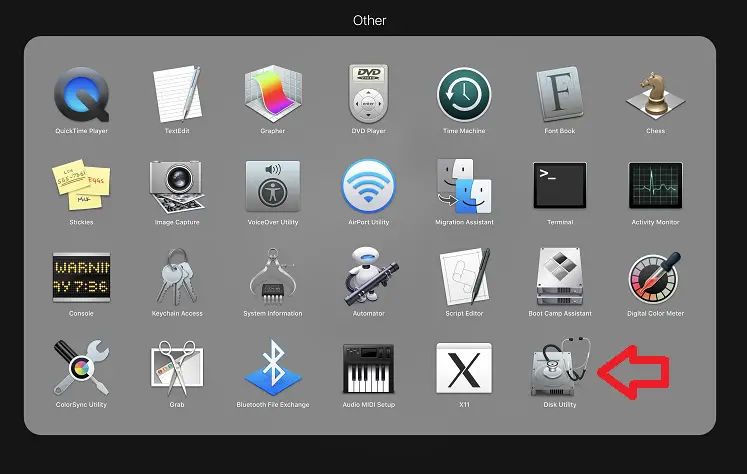
Step 1. Turn on your Mac device normally and boot into Mac OS. Then open the Launchpad and click on “Other”. From that list open Disk Utility.
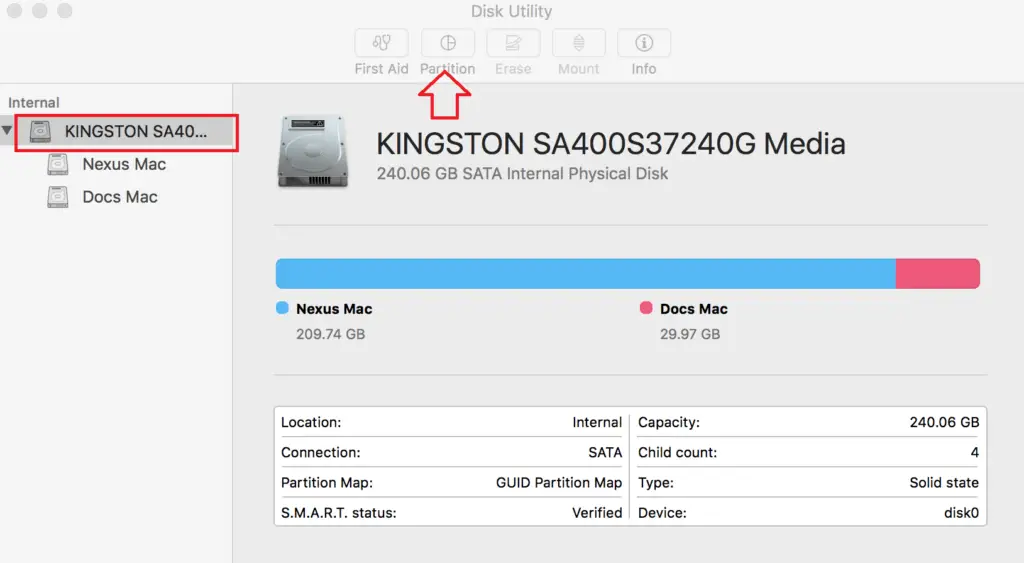
Step 2. In the Disk Utility, on the left side select your drive (SSD or HDD). After that select the partition tab. Here Disk Utility will show you the layout of the partition.
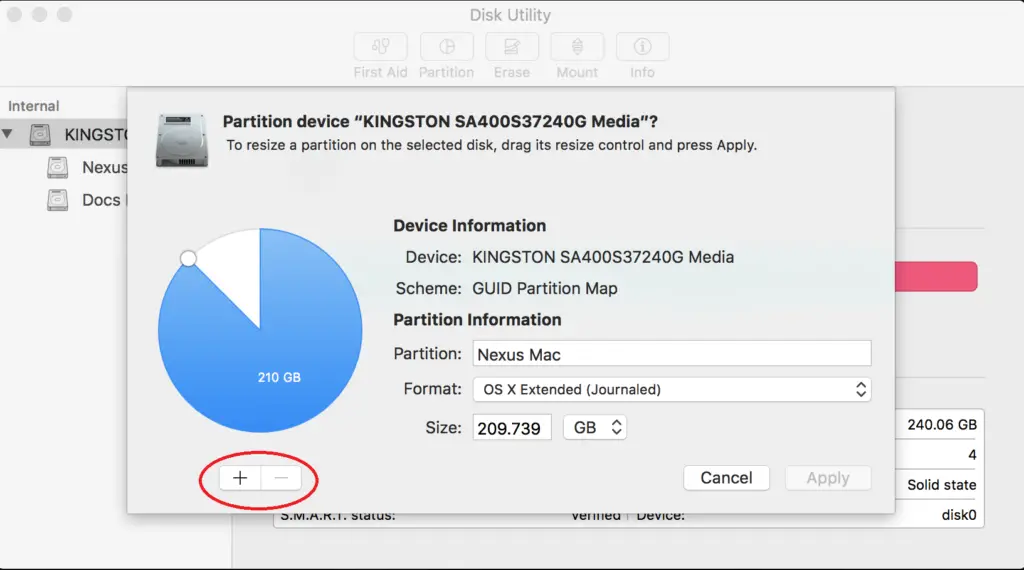
Step 3. To create a new partition, click on the small “+” sign.
Step 4. Select the new partition that you have created and enter a name for it. (Remember to enter a name that you can easily recognize later when installing Windows 10). Select the size of the partition (minimum size should be at least 30 GB). And finally, select the partition format. (Choose either ExFat or DOS here, remember you have to format the partition as NTFS later when installing windows 10).
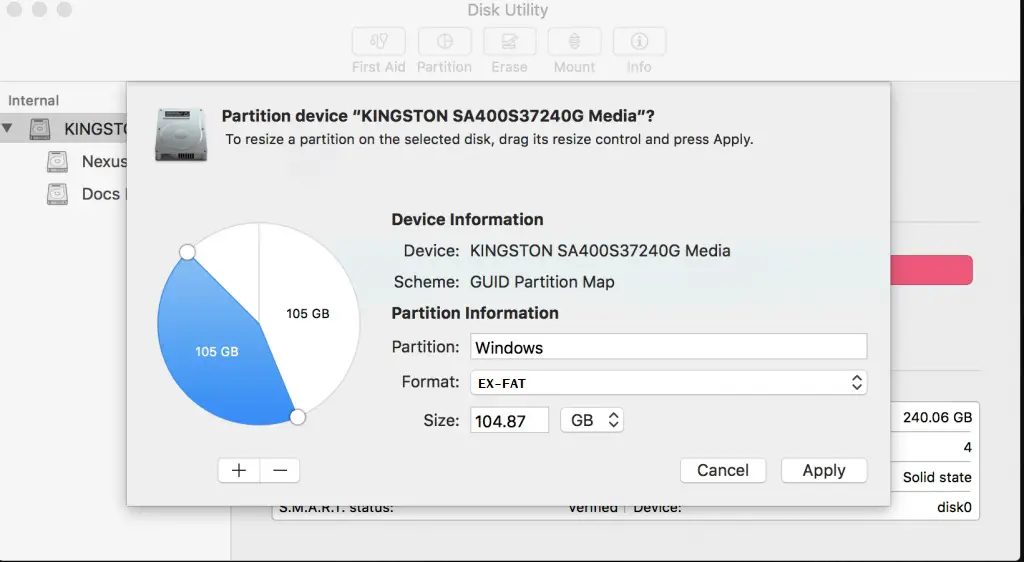
Step 5. After entering all the required information click on the Apply button. When you see the following error message click on the Partition button. Once the new partition has been created, close the Disk Utility tool.
Step 6. Now, you need to create a bootable Windows 10 installation media. Here is a quick step-by-step video guide on how to create Windows 10 bootable USB on Mac without Bootcamp. If you already have Windows 10 bootable media, you can skip Step 7 and proceed to Step 10.
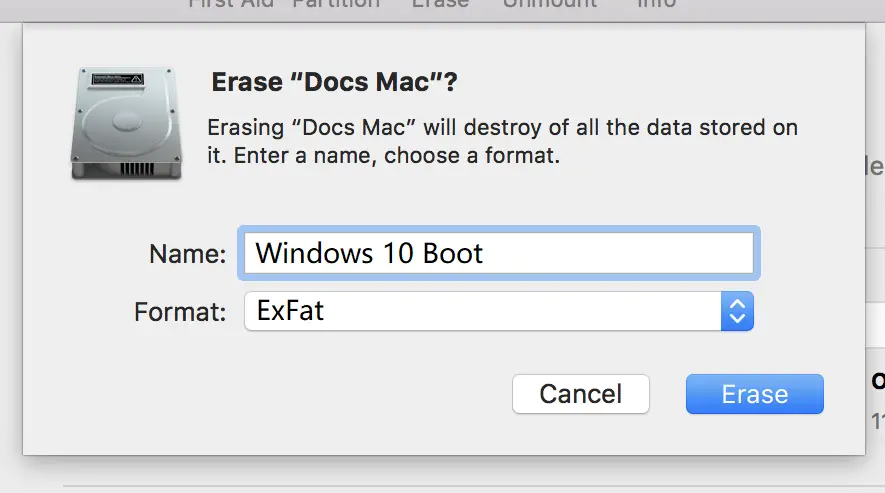
Step 7. Plugin your USB Stick and start Disk Utility. In the left panel under external, select your USB device. Click on the Erase option and select all the options as follows. Then click on Erase.
Format: ExFat
Scheme: Master Boot Record
Step 8. Create a Bootable Media
- Download and install “unetbootin” from the following web link. (It’s free open-source software).
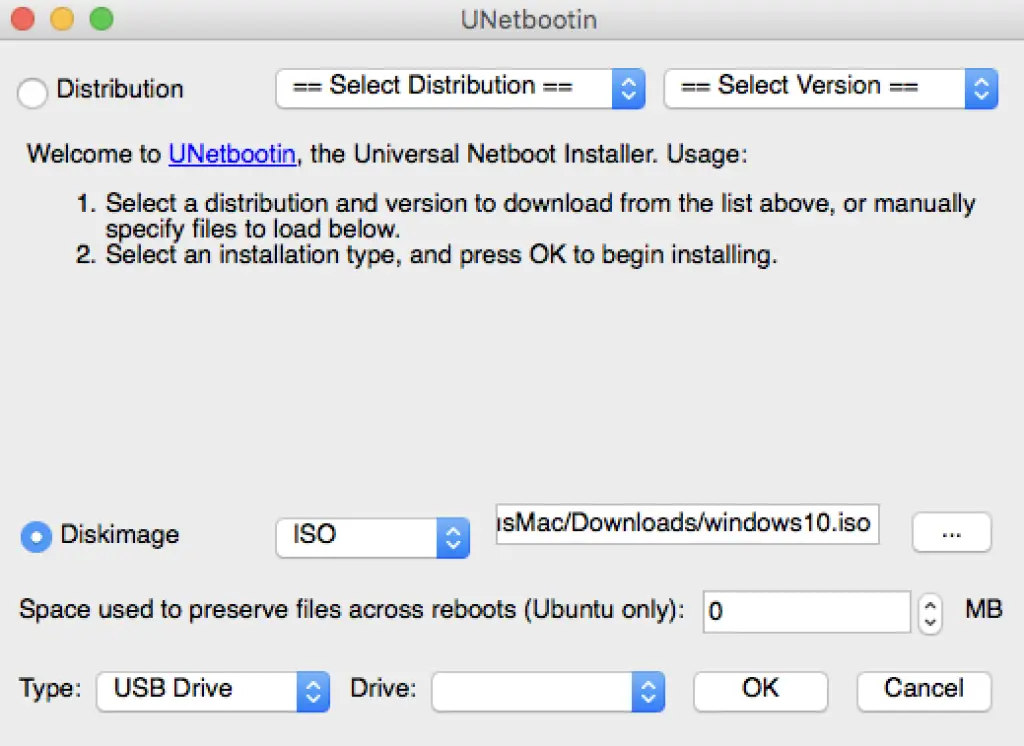
- Plugin your USB Stick and start unetbootin (Enter your password here if required). Then select all the options as follows and click OK. (It may take a few minutes to complete this process)
- Disk image: Check the Diskimage option and browse and select your Windows 10 ISO file.
- Type: USB Drive
- Drive: Your USB drive (you should only see one drive here, if you have multiple drivers listed here, confirm the right device before selecting the drive)
(* Before Step 10 it is crucial to disconnect all the external drives which are connected to the machine. Unplug everything except your keyboard. Also if you have multiple drives connected, disconnect them all except the one on which you want to install Windows 10)
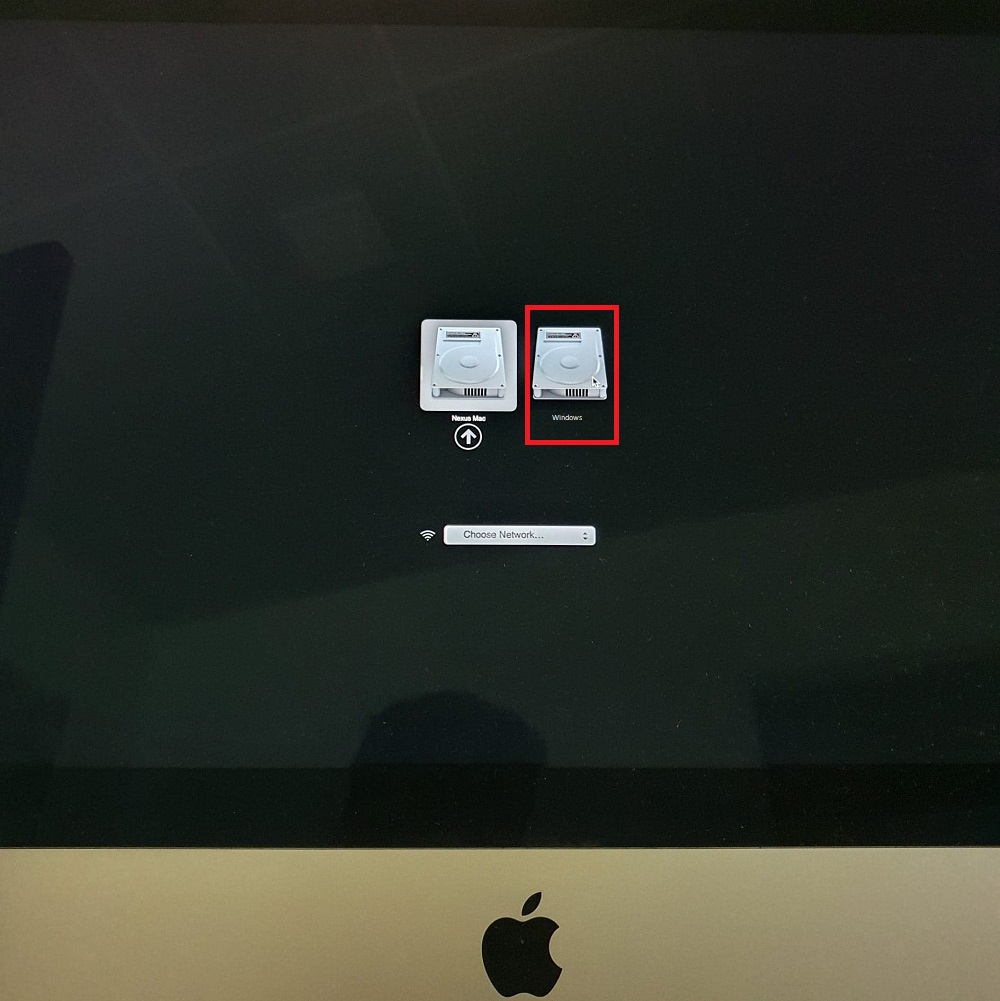
Step 10. Once your bootable media drive is ready, Restart your Mac and while restarting hold down the “ALT” (Option) key. This will bring up the following screen. Here select the Windows option. (Only select EFI if you are certain)
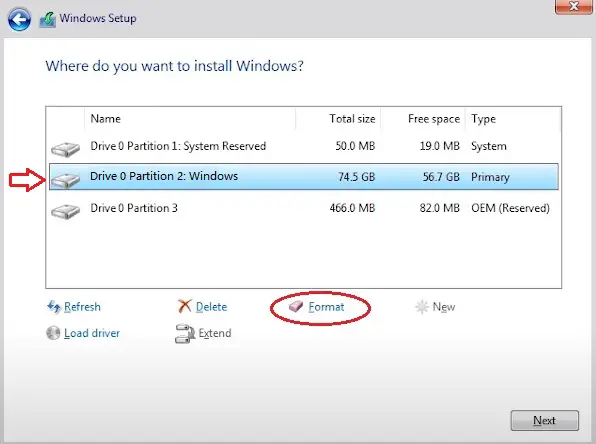
Step 11. Select the newly created partition in the following partition selection screen and click on the Format button to format the new partition with NTFS. (Remember to make sure whether you have selected the right partition before clicking on the Format button.)
Step 12. Then click on the Install button. It will take a few minutes to complete this process. (Note that during Windows 10 installation, your machine will restart several times. Remember to hold down the ALT key and select Windows in the option to continue the installation.)
Step 13. From here onwards, you will need to follow the standard Windows 10 installation procedure.
Step 14. Once the installation is completed, make sure to check whether everything works fine.
That’s it. If you find any problems when you install Windows on Mac without Bootcamp feel free to mention them in the comment section. We are here to help you.
Also Read: How to Install Windows 11 on Mac Without Boot Camp


2020 version of Windows 10 ISO downloaded from microsoft:
Step 11 was never presented. I was able to complete step 10.
When I install Windows 10 I get the following error:
windows cannot open the required file c:\sources\install.wim. Make sure all files required for installation are available, and restart the installation. error code: 0x8007000d
I did a little research on the error. I found that the install.wim may be larger than 4GB. If the file is larger than 4GB it will exceed the FAT32 format capablities. Any help is apperciated.
Using a Windows 10 DVD or ISO on drive letter F: and a USB key (8GB or larger) on driver letter G: … do the following:
Insert the Windows DVD or mount the Windows ISO.
Insert the USB key.
Open an administrative command prompt.
Type: diskpart
Press ENTER
Type: list disk
Press ENTER
Type: select disk [replace this with the number assigned to USB key]
Press ENTER
Type: clean
Press ENTER
Type: create part primary
Press ENTER
Type: Active
Press ENTER
Type: format fs=fat32 quick
Press ENTER
Type: assign
Press ENTER
* The ‘assign’ command may change the letter assigned to your USB key! Type assign and press ENTER again to change it back *
Type: exit
Press ENTER
Type: F:\boot\bootsect.exe /NT60 G:
Press ENTER
Type: robocopy F:\ G:\ *.* /MIR /XF install.wim
Press ENTER
— wait for it to complete
Type: dism.exe /Split-Image /ImageFile:F:\sources\install.wim /SWMFile:G:\sources\install.swm /FileSize:3500
Press ENTER
— wait for it to complete
* This could take a while… and there is little or no status output… be patient.
That should be it… eject the USB key and see if it will boot a desktop or a laptop.